Finding a job may be a time and energy-consuming task. Opus is a program written to help people to send their application more easily. It can be used to generate personalized cover letter. I began to write it several years ago and I took the time to enhance it with the aim to help other people.
During this experience, I got better at python programming, I learned graphical interfaces with pyQt and how to make a windows self extracting executable.
Opus is basically a "mass mailing system" based on templates. The user adapts his cover letter with keywords that are substituted with data coming from an excel file.
Opus is still in an early stage. User is responsible of its use and of the messages that are sent.
Install
Opus is a opensource software. There is a self extracting executable availaible for windows but it is possible to use it from the sources.
Opus is written in python. It needs the following dependencies:
- appdirs
- lxml
- xlrd
- PyQt5
Just clone the git repository after installing the dependencies in a python virtualenv.
 git clone https://gitlab.com/jnanar/opus.git
 cd opus
 virtualenv venv
 source venv/bin/activate
 pip install .
You can test it with its demo data and configure it later (see section getting started).
python3 opus.py
It is also possible to download the sources as a zip file on the repository.
Getting started
TLDR (windows): Download Opus for windows and launch it. See the generated files in directory %temp%\opus\data\sent. Edit %temp%\opus\data\list.example.xlsx, generate the letters and see what happens.
sha256sum opus_win_1.0.1.exe
9d94f1fc41d4dc26632a0dce13120c68b4454d390f4eb59bebe1f350bb048d89  opus_win_1.0.1.exe
- Download Opus start pack which contains a sample configuration file and templates.
- Rename the configuration file to opus.ini and personalize it. (see section Configuration).
- Edit or copy the repository (data/list.example.xlsx) with Libreoffice or Excel. (see Repository edition)
- Personalize the cover letters. Two templates are available: spontaneous application and application for an offer. (see Letters edition)
- Launch Opus. Two interfaces are available: CLI (in french) and a GUI. (see Interfaces). I will assume that you use the graphical interface.
- You can configure Opus by editing the settings. The best idea is to select the configuration file of the Opus start pack and rename the templates. You can link your own templates in the 'file' section. Once you are ready, generate the letters.
- The files are generated in the output directory (see Configuration).
- Once you have edited the letters and the mails (remove the bold texted that was substituted), you can convert it to PDF. If Libreoffice 5 is installed, Opus can convert all the document at once. if not, you can convert the .docx to PDF with Word.
- You may now send the mail. A copy is sent to your adress. Once the mails are sent, you must edit the first column of the repository (xlsx file). Only empty first cells allows the generation of the letters.This prevent to sent multiple times the same application. I strongly advise to move the generated documents in another folder. It will help you to keep in mind what you have already sent.
I strongly suggest to sent the first letters to your email in order to see what the recruter will get.
Interfaces
Two interfaces are available: cli and gui. The launch opus.py with option -i or --interface to select it. By default the graphical interface is chosen.
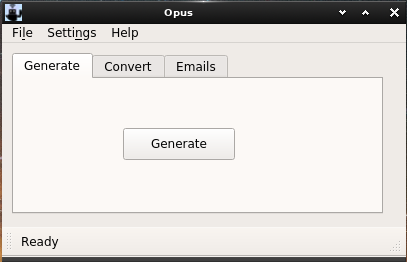
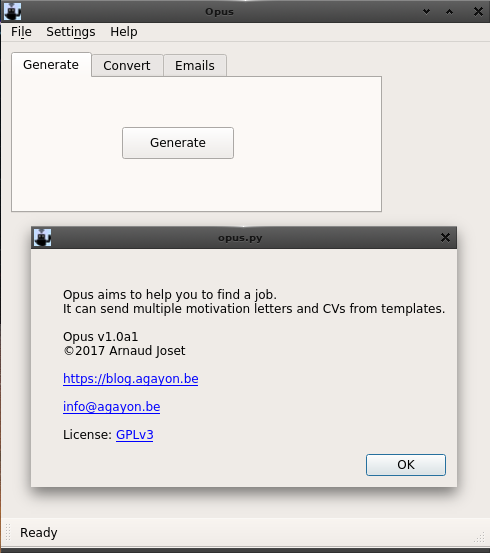
Graphical interface(GUI)

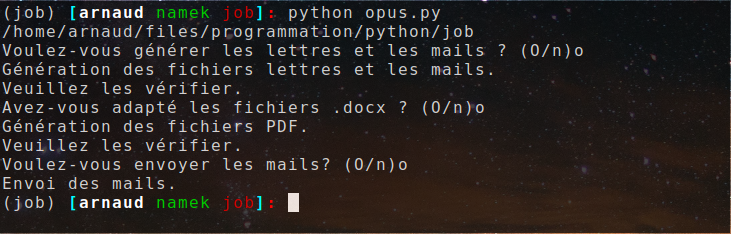
Command line interface (CLI)
This interace is usefull but it is only avaible in french for now.
Configuration
The ini file has 3 sections.
Personal information
- Your full name
- The subject of mails for spontaneous applications
- the subject of mails when responding to offers
- Your lang (EN).
The files
- Templates of letters
- Your CV (PDF file)
- The repository (data/list.example.xlsx by default),
- emails templates
- output directory (/data/sent/ by default)
Send emails
You need to configure the smtp options in order to be able to send emails. These parameters depends on your email provider (eg gmail, hotmail, etc)
The parameters are:
- smtp server address
- user name
- password (clear text in the
inifile). - port number.
If one of those parameters do not need to be set, just indicate None. The following example show a server that does not need authentication:
server = example.com
user = None
password = None
port = 25
Repository edition
Each line of the xlsx file corresponds to an application. The information of each column are processed and used in the cover letter and the email. The editable fields are:
- sent indicate something if the application must not be sent. For example if you already sent the email to this company.
- company: company name
- sector
- nom: if you sent the application to a person whose name is known.
- gender: the gender of the recipient (Sir, madam, Sir or madam)
- interest: your interest for the company
- offer: the offer reference
- subject: the reference of the offer to put in the subject mail.
- email: the email recipient
- language: lang: EN or FR
- web, telephone, number, information: complementary useful information. These data are not used yet.
Edition of the cover letters
Several fields are available
- TIME: the date of the day
- GENDER: the gender of the recipient (Sir, madam, Sir or madam)
- INTEREST: your interest for the company
- COMPANY: company name
- SECTOR: the sector of the company
- OFFER: the reference of the offer.
The same fields are usable in the emails.
Help !
- The log is located in
%temp%\opus\opus.logon windows (exe file) and in the main directory otherwise. - You can contact me, I will try my best to help users.
About the Windows program
- I generated it with cx_Freeze (see setup.py) and 7z SFX Builder.
The following configuration file was used:
;!@Install@!UTF-8!
RunProgram="opus_win.exe"
;Config file generated by 7z SFX Builder v2.1.)
;!@InstallEnd@!
7zSFXBuilder_7zArchive=C:\Users\xx\windows_setup\opus.7z
7zSFXBuilder_SFXName=C:\Users\xx\windows_setup\opus_win.exe
7zSFXBuilder_SFXIcon=C:\Users\xx\icon\opus.ico
7zSFXBuilder_UseDefMod=7zsd_All
Conclusion
Good luck !