Intro
During these weird time of corona virus crisis, like many, I am working from home and cancelled all social activities. Apart from the distanciation, the virus, the lack of activities, it has been a quite fruitful period as I work a lot on the robot. This articles sums up the latest developments and achievements.
New functionnalities
My robot, the Agayon has now kite a lot more features. Among which:
- Video streaming nearly in real time. The stream can be viewed in a web browser. It works quite well and has been used across the internet. Some friends or family members have visited me with the help of the robot. The only drawback is that I have to limit the stream to 10 frames per second. The setup is based on mjpg-streamer and the custom layout is available on his dedicated Gitlab repository.
- The Agayon can now be remotely controlled with
- A PS4 controller (Bluetooth)
- REST API to control the robot.
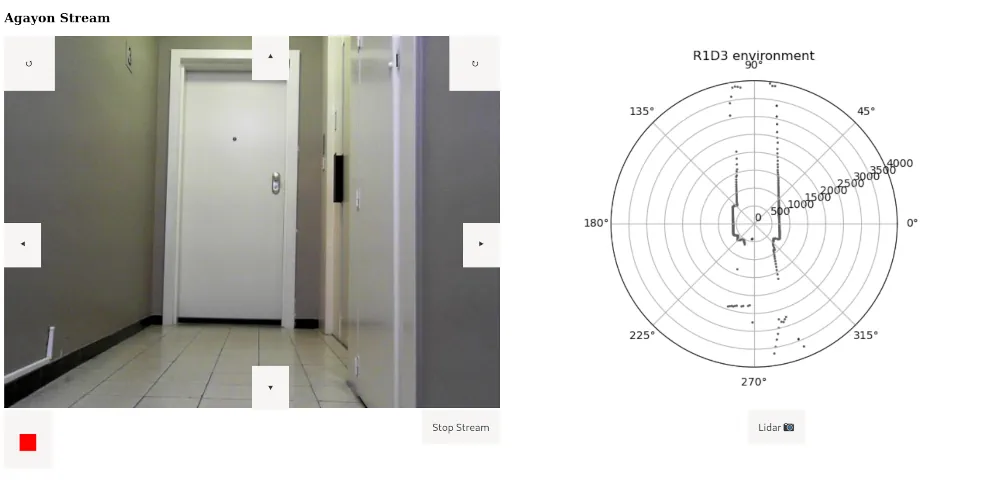
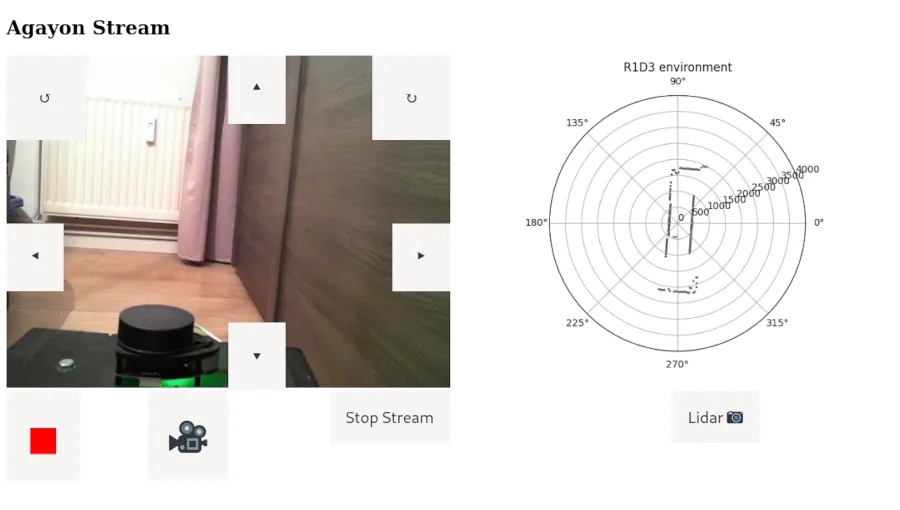
- A web interface that uses the API (see screenshot below)
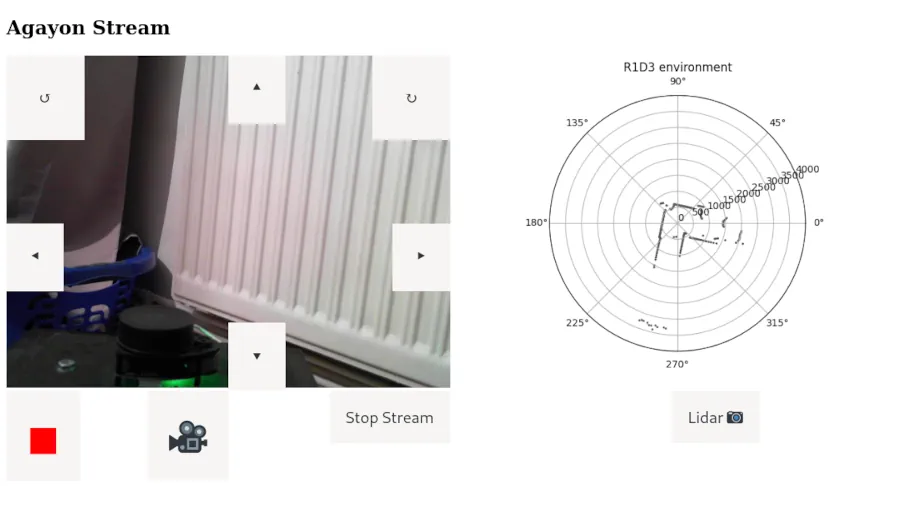
- Lidar mapping: It can be triggered by the PS4 controller, the web interface or XMPP. I use a RPLidar A1M8. Data is saved in a file that can be analyzed afterward. No real time data processing for now.
- XMPP: migration from the deprecated Sleekxmpp library to the more modern one Slixmpp.
Changelogs
Python (Raspberry Pi)
The code is available on my gitlab account.
- Small turn angles for remote control. The robot was sometime too much brutal during rotation. This version adds the support for 'gentle turns'. During the new gentle turns, only one wheel is moving. The 'normal turn' remains and it rotates both wheels in opposite direction.
- Start and Stop Webcam streaming from socket. It relies on the
restart_stream.shandstop_stream.shscripts. It is used from the web interface and XMPP. - Mapping: simple scan and logging of all mapping data. It Saves a picture (polar graph) for each snapshot.
- Arduino communication: serial data to get the ultrasonic sensors measurements.
- The rover can be remotely controlled with a PS4 controller. Events are caught and instructions are sent through serial communication to Arduino.
- Some refactoring and cleaning.
- A lot of bug fix.
Arduino
The code is available on the gitlab repository.
- I created a small Serial manager to handle orders from the RPI. It can be used to remotely control the motors, get ultrasonic measurements, change speed, change mode (incremental or directly to a mode number), capacity to turn a little (small angles but not that small )
- Send formatted serial data that can be easily parsed by the RPI process (odometry).
- A lot of bug fix
Misc
The web remote control is based on a small webservice depending on with the Flask framework. It is served with uWSGI with the help of Nginx. The sources are on the Gitab related repository. It is used to control the robot with a web interface but any client able to use a web API can use it. Maybe an Android client will follow?
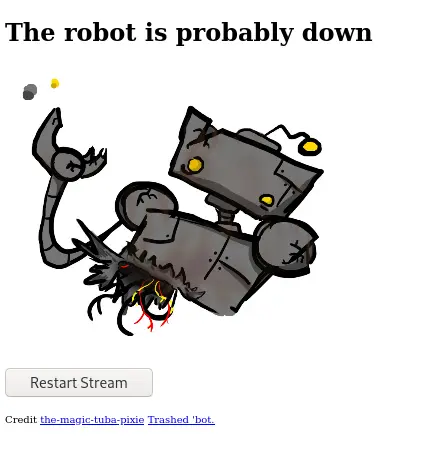
When the video streaming service is unavailable, a 503 error is displayed with a custom page.
I use it to launch the Webcam streaming directly from the navigator.
All the configuration, HTML pages, scripts and config files are available in a separate repository.
Once mjpg_streamer is launched, it serves a small page to interact with the API.
This picture was taken at the beginning of a ~4m narrow hallway.
Pictures
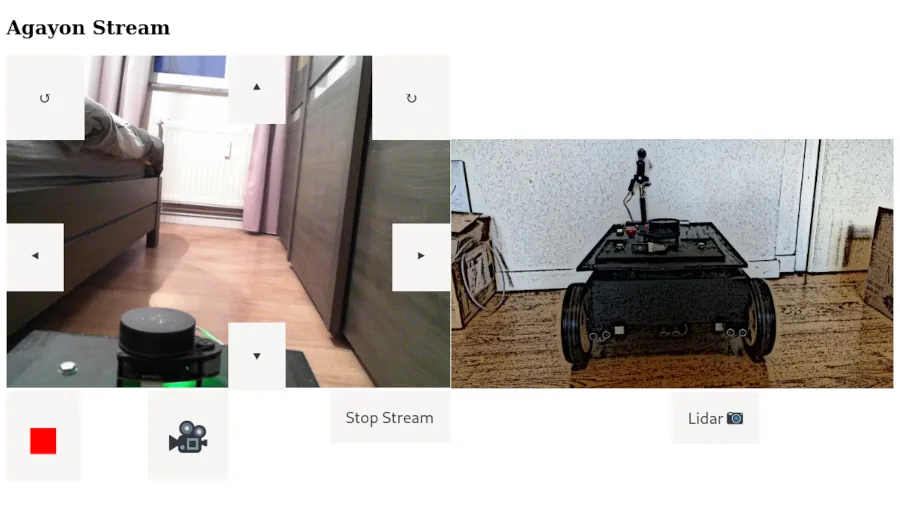
Here are some pictures token in my apartment. As long as no Lidar measurment has been made, a cartoonish picture of the robot is displayed. As the robot is going forward, the mapping is updated by clicking on the Lidar camera button. For unknown reason, the left/right mapping is inverted in the picture.
Start
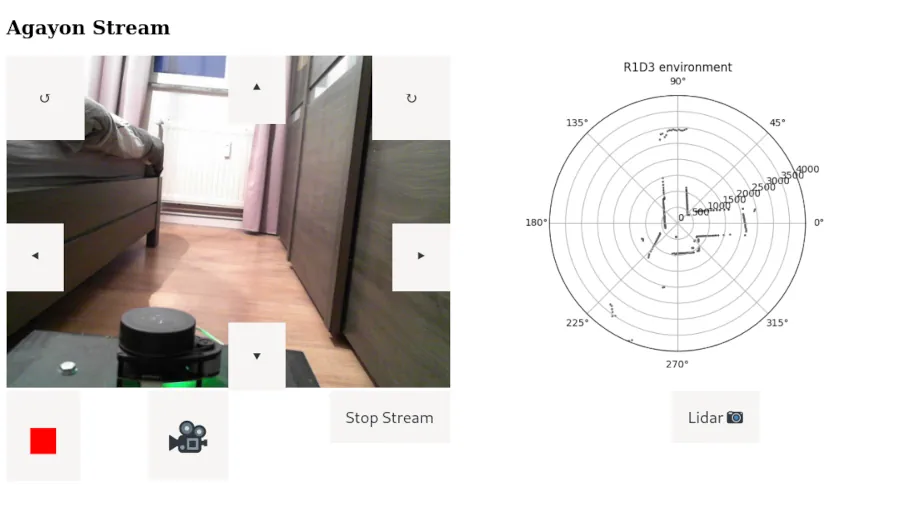
Middle
End
Future
There are still a lot of room for improvements. Here are some ideas to occupy me in the future:
- Automatically save a camera picture when the lidar mapping is triggered.
- Detect the kernel messages about battery. When the voltage is too low, the information is logged by the kernel and can be found with systemd. The idea would be to shut down the robot when necessary to avoid SD card memory corruption.
- Apply some nice OpenCV filter to obtain a transformed video stream line in the movie Terminator. :-)
- Use one button to trigger the video recording. Use a blinking LED to let known that it is "On Air".
- ...
Recording movies with the camera
Recording a movie with OpenCV can be done in less than 25 python lines. It works well with my old Logitech C170 but for some reasons it did not work out of the box with my Microsoft LifeCam Studio.
Dear visitor, if you have such a camera, here the magic trick to produce your new feature movie ! First, make sure to have this model with the lsudb command:
Bus 001 Device 007: ID 045e:0811 Microsoft Corp. Microsoft® LifeCam Studio(TM)
The camera produce naturally a MJPG stream. I would sum it up a stream of JPEG pictures. By default, the VideoWriter class will produce empty video files. Unfortunately, by default there are no debug message to help you. Don't forget to use the following environment variables during your hacking sessions:
OPENCV_VIDEOIO_DEBUG=1
OPENCV_LOG_LEVEL=verbose
To make it work, you need to tune the camera settings before obtaining the desired result. The complete program is displayed here. Follow the comments to see where the magic happens.
import cv2
import os

cap = cv2.VideoCapture(0)
if not cap.isOpened():
    raise IOError("Cannot open webcam")

# Magic number corresponding to a MJPG Stream
codec = 0x47504A4D
# You actually says that your camera produces such a stream
cap.set(cv2.CAP_PROP_FOURCC, codec)
# We fix the resolution, the framerate and use exactly the same in the VideoWriter arguments
cap.set(cv2.CAP_PROP_FRAME_WIDTH, 640)
cap.set(cv2.CAP_PROP_FRAME_HEIGHT, 480)
# The framerate is not limitating here
cap.set(cv2.CAP_PROP_FPS, 20.0)

# next we define the filename, the writer options and start the infinite loop.
videoname = os.path.join('/tmp/', f"output.avi")
fourcc = cv2.VideoWriter_fourcc(*'MJPG')
video_writer = cv2.VideoWriter(videoname, fourcc, 20.0, (640, 480))

while True:
    ret, frame = cap.read()
    video_writer.write(frame)
    # When the Q key is pressed, the loop is stopped
    if cv2.waitKey(1) & 0xFF == 27:
        break

cap.release()
video_writer.release()
cv2.destroyAllWindows()
Webserver configuration
You can find here the webserver and uWSGI configurations used to make it work.
Nginx
upstream mjpeg {
 server 127.0.0.1:8090;
}

server {
  listen 443 ssl;
  server_name namek.agayon.netlib.re;
  location / {
  proxy_redirect off;
  proxy_pass http://mjpeg;
  index index.html;
  }
  location /api {
    include uwsgi_params;
    uwsgi_pass 127.0.0.1:3031;
    proxy_read_timeout 300s;
  }


  location /static/ {
    alias /srv/http/ngnix/r1d3/public_html/static/;
    try_files $uri $uri/ /static/lost_bot.jpg;
  }

   ssl_certificate     /etc/letsencrypt/agayon.netlib.re_fullchain.pem;
   ssl_certificate_key /etc/letsencrypt/agayon.netlib.re.key;
   ssl_session_timeout 1d;
   access_log /var/log/nginx/r1d3.access.log;
   error_log /var/log/nginx/r1d3.error.log;
   error_page 500 502 503 504 /500.html;
   location = /500.html {
       root   /srv/http/ngnix/r1d3/errors;
       allow all;
       internal;
   }
   proxy_read_timeout 720s;
   proxy_connect_timeout 720s;
   proxy_send_timeout 720s;
   proxy_set_header X-Forwarded-Host $host;
   proxy_set_header X-Forwarded-For $proxy_add_x_forwarded_for;
   proxy_set_header X-Forwarded-Proto $scheme;
   proxy_set_header X-Real-IP $remote_addr;
}
uWSGI
[uwsgi]
chdir = /srv/http/ngnix/api/rest_api/

processes = 4
threads = 2
plugin = python
virtualenv = /srv/http/ngnix/api/rest_api/venv

module = api_agayon.agayon_app:app
callable = app
wsgi-file = wsgi.py
master = true
socket = 127.0.0.1:3031

;route-uri = ^/api/(.*) rewrite:/$1
vacuum = true

die-on-term = true
kill-on-idle = true

wsgi-file = wsgi.py

stats = 127.0.0.1:9191
buffer-size=32768