Pendant mes trajets en voiture, j'aime écouter des podcasts. Ma voiture supporte la connection Bluetooth avec un téléphone mais pour diverses raisons, je préfère utiliser une bonne vieille clé USB.
Je récupère les épisodes à l'aide de l'application GNOME Podcast qui récupère les flux RSS/Atom.
Les scripts ci-dessous me permettent d'écouter La semaine des 5 heures pendant des heures, étant donné qu'ils sont passés à une formule quotidienne. J'écoute également d'excellents podcasts de France Inter: Blockbusters et La Science, CQFD sur France Culture.
RTBF AUVIO
Il y a quelques mois, le site Auvio de la RTBF a changé et les liens des podcasts n'étaient plus autant mis en avant. Je suis nénmoins tombé sur ce forum qui m'a aidé à trouver la solution:
Le nom du programme en toutes lettres est remplacé par des chiffres, identiques au code d'Auvio, la plateforme de Replay/Podcast de la RTBF.
Ainsi, la semaine de 5h, l'émission cinéma dont l'identifiant 1451 voit ses addresses évoluer comme ceci:
Par ailleurs, ma voiture ne sait pas lire les fichiers m2a récupérés par l'application. Je les convertis à l'aide de FFMPEG afin de les lire. J'utilise les scripts ci-dessous pour lire le tout.
Le premier converti les fichiers en mp3 et le second les renommes en fonction de la date de l'épisode.
It's been a long time since I updated this blog. It will be a short update post about two projects.
chatty_server
The first is chatty_server, a small XMPP bot I use to interact with my server. It allows me to get information about the CPU load, traffic, weather etc.
It also has a small feature to get reminder messages. There was a bug that allowed anyone to spam reminders. Anybody can add the bot to their rooster and could create random reminders that I would get.
I got none, so the bot must remain quite unheard-of.
HTTPAuthentificationOverXMPP
The second project is HTTPAuthentificationOverXMPP, a component that I use to allow 2 Factor authentication with XMPP.
The original project had not been updated for a long time and I wanted to try to modify it to rely on another XMPP go library.
I have never coded in the Golang language and it seemed like a nice introduction. I relied on go-xmpp where I added the support for XEP 0070. It was really interesting. The new component is running for several months and I am quite happy with it even if I don't have any serious project relying on it.
The https://demo.agayon.be/ website is still up if you want to test it.
I hope being able to provide more update about my projects in the future :-).
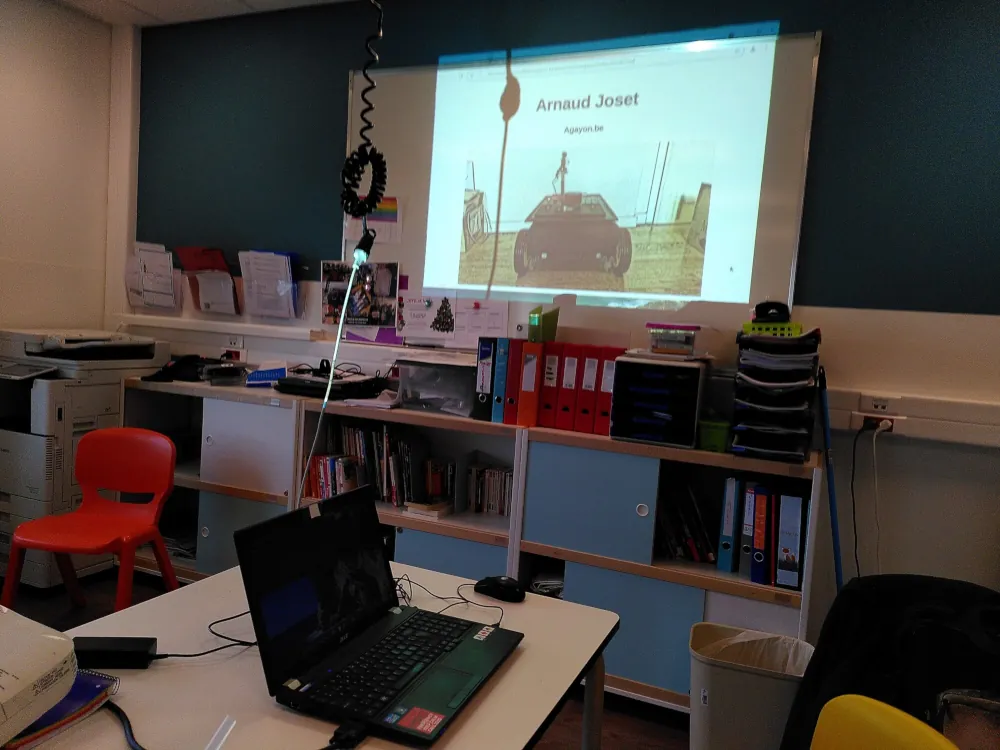
Today, I was lucky to be invited in the school of the Hospital Mont Légia in Liège. It was an afternoon session following their science course to present the Agayon to children and teenagers (~6 to 16 years old).
They follow their schooling while being hospitalized.
I was contacted by a friend of a friend who works there as a physics teacher. He likes to organize interactive sessions with the children to ease their day. It mainly teaches to the older ones but the youngest were quite happy to discover it too.
Equipment and setup
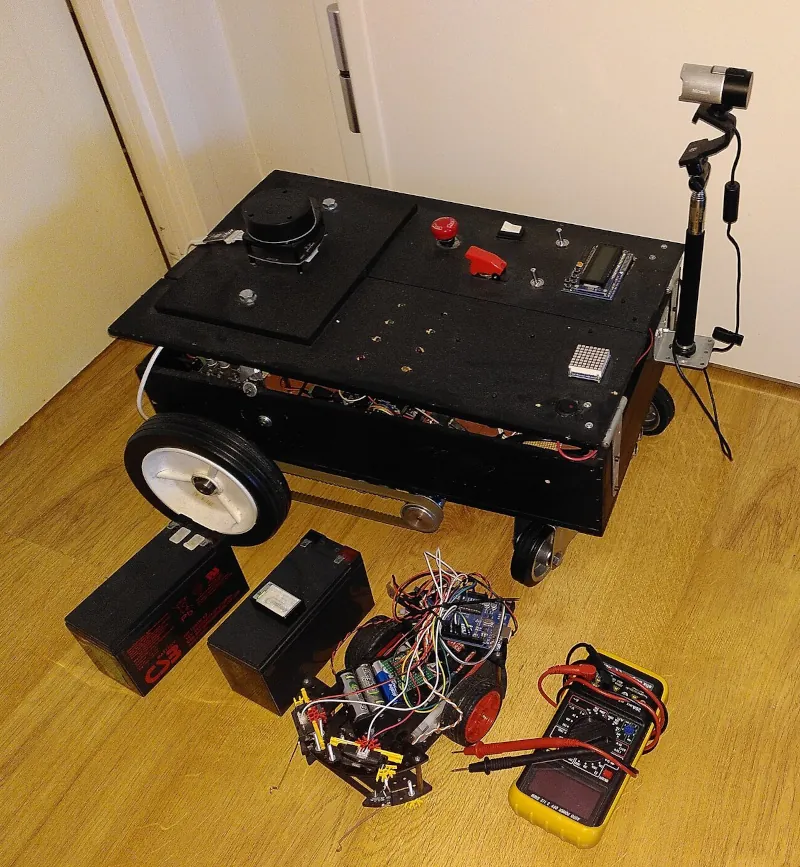
I brought the Agayon, R1D1, my other small robot, the wireless PS4 controller,some material and additional batteries.
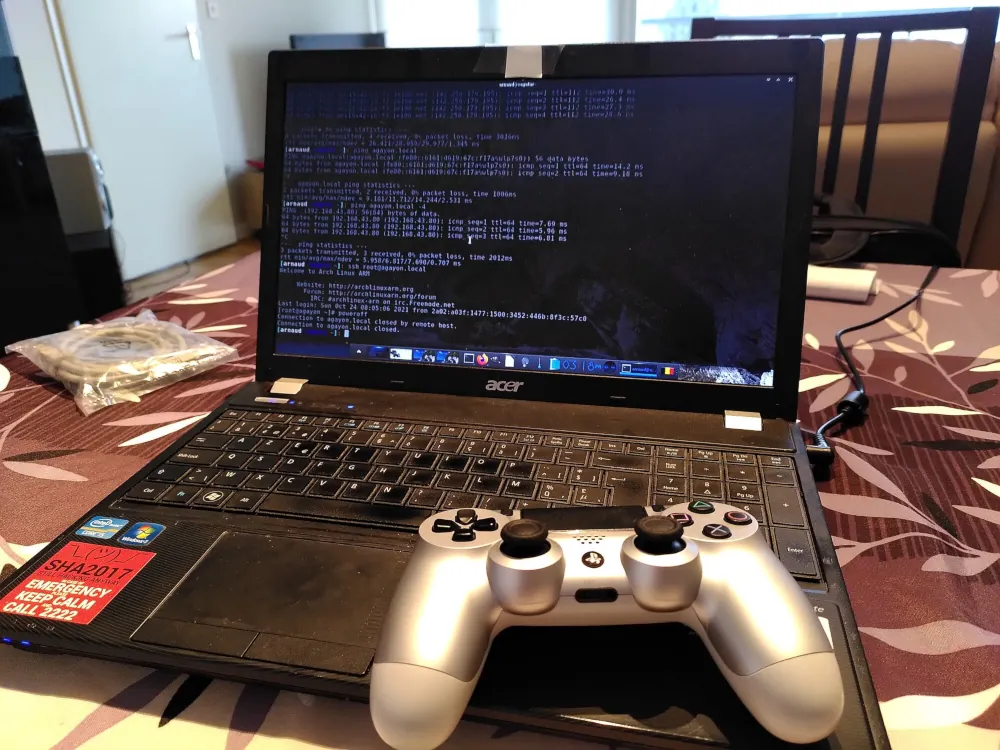
The day before, I made sure I could connect to the robot through SSH using the WiFi of my phone as a tethering hotspot. I would not be able to have another internet connection.
Fortunately, the webcam streaming and web connection works well with my Fairphone 3.
The animation
I started with a small presentation available online (in french) and question/answer with the children.
After that, the children played with the Agayon using the remote or the autonomous mode. They also used some awesome accessories.
I was super happy with the result, the interactions and to see that I made the day of some of them 😁.
It's been a while since I first installed prosody on Agayon.be. I use it to experiments with my bots, to keep contact with the XMPP community and discover new cool stuffs to do.
Recently I struggled a bit because I wanted to hide the prosody small HTTP server behind my Proxy. For various reasons, I still use Apache 2.4 and I could not get it to work with prosody. I mostly use the HTTP server for bosh authentication with Converse.js and with the http_upload module.
When the 5281 port was accessible and Prosody handled the requests directly on the internet it worked well. But when I followed the documentation to use a proxy, it stopped working.
All my PUT requests got a 404 error. I tested my setup with Slixmpp and the http_upload example.
During these weird time of corona virus crisis, like many, I am working from home and cancelled all social activities. Apart from the distanciation, the virus, the lack of activities, it has been a quite fruitful period as I work a lot on the robot. This articles sums up the latest developments and achievements.
New functionnalities
My robot, the Agayon has now kite a lot more features. Among which:
Video streaming nearly in real time. The stream can be viewed in a web browser. It works quite well and has been used across the internet. Some friends or family members have visited me with the help of the robot.
The only drawback is that I have to limit the stream to 10 frames per second.
The setup is based on mjpg-streamer and the custom layout is available on his dedicated Gitlab repository.
The Agayon can now be remotely controlled with
A PS4 controller (Bluetooth)
REST API to control the robot.
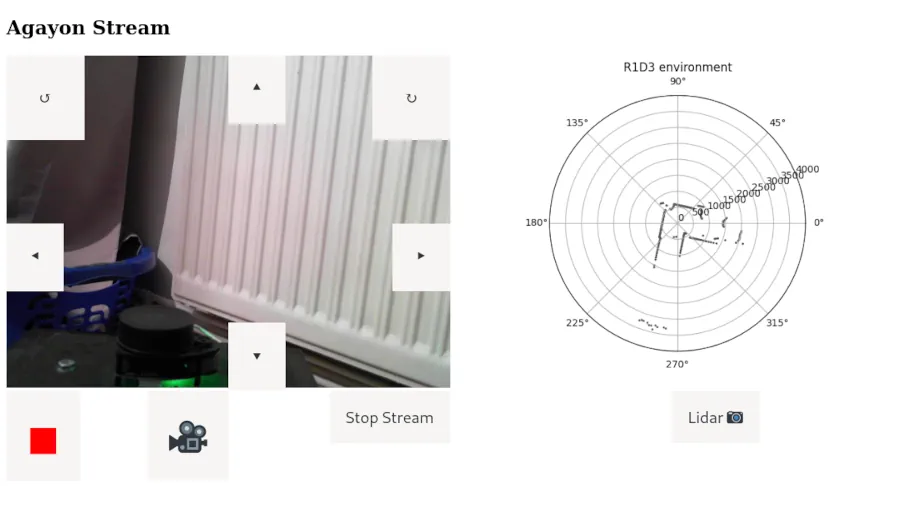
A web interface that uses the API (see screenshot below)
Lidar mapping: It can be triggered by the PS4 controller, the web interface or XMPP. I use a RPLidar A1M8.
Data is saved in a file that can be analyzed afterward. No real time data processing for now.
XMPP: migration from the deprecated Sleekxmpp library to the more modern one Slixmpp.
Small turn angles for remote control. The robot was sometime too much brutal during rotation. This version adds the support for 'gentle turns'. During the new gentle turns, only one wheel is moving. The 'normal turn' remains and it rotates both wheels in opposite direction.
Start and Stop Webcam streaming from socket. It relies on the restart_stream.sh and stop_stream.shscripts. It is used from the web interface and XMPP.
Mapping: simple scan and logging of all mapping data. It Saves a picture (polar graph) for each snapshot.
Arduino communication: serial data to get the ultrasonic sensors measurements.
The rover can be remotely controlled with a PS4 controller. Events are caught and instructions are sent through serial communication to Arduino.
I created a small Serial manager to handle orders from the RPI. It can be used to remotely control the motors, get ultrasonic measurements, change speed, change mode (incremental or directly to a mode number), capacity to turn a little (small angles but not that small )
Send formatted serial data that can be easily parsed by the RPI process (odometry).
A lot of bug fix
Misc
The web remote control is based on a small webservice depending on with the Flask framework. It is served with uWSGI with the help of Nginx. The sources are on the Gitab related repository. It is used to control the robot with a web interface but any client able to use a web API can use it. Maybe an Android client will follow?
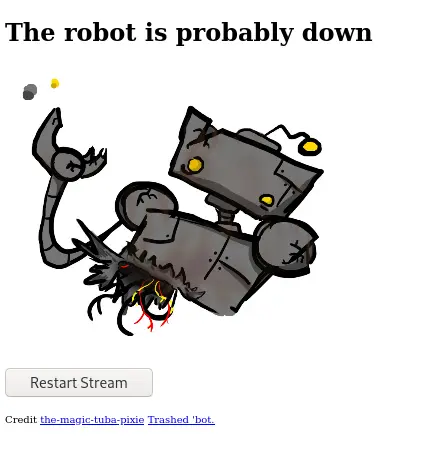
When the video streaming service is unavailable, a 503 error is displayed with a custom page.
I use it to launch the Webcam streaming directly from the navigator.
All the configuration, HTML pages, scripts and config files are available in a separate repository.
Once mjpg_streamer is launched, it serves a small page to interact with the API.
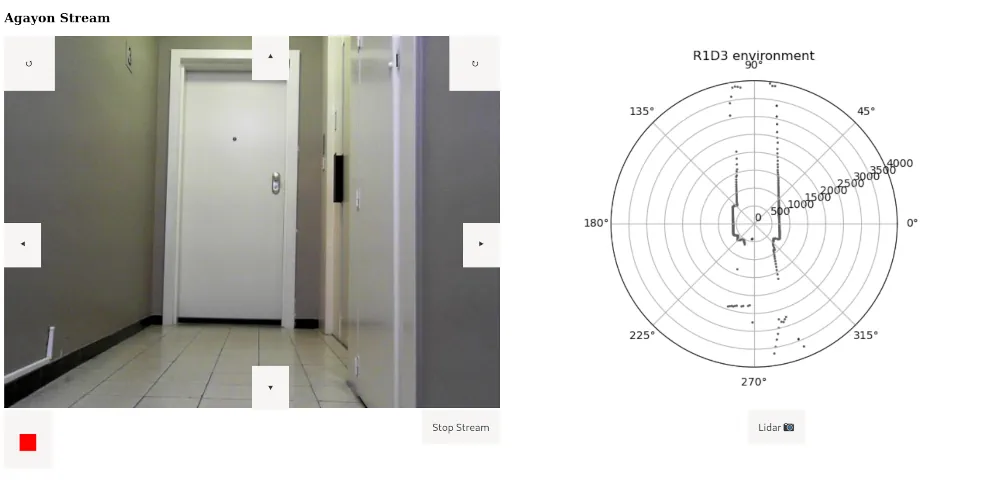
This picture was taken at the beginning of a ~4m narrow hallway.
Pictures
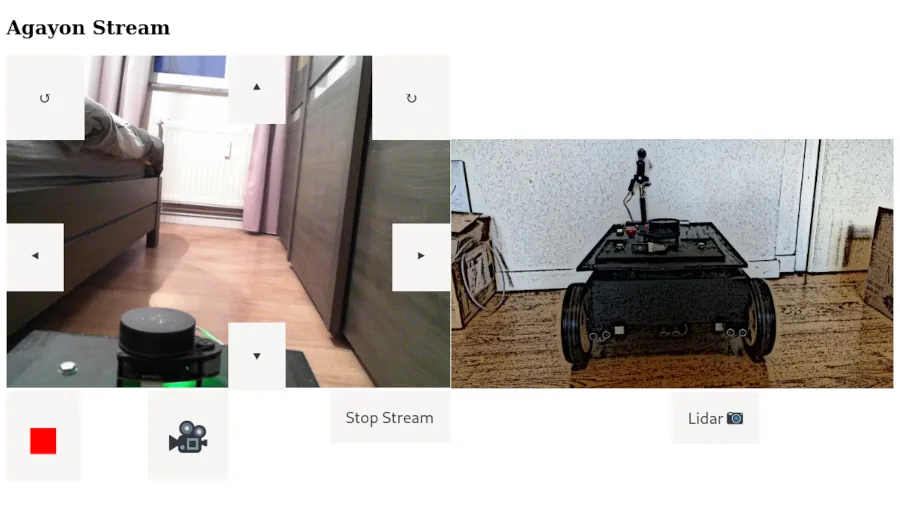
Here are some pictures token in my apartment. As long as no Lidar measurment has been made, a cartoonish picture of the robot is displayed.
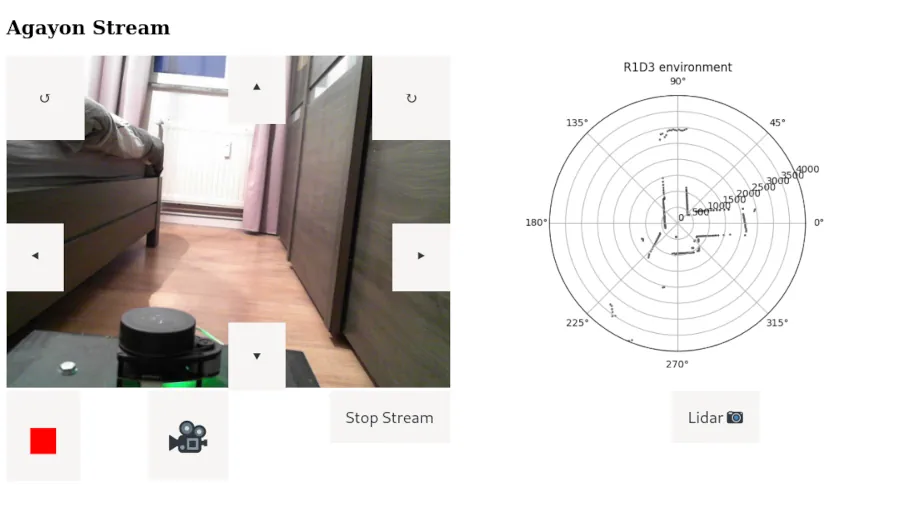
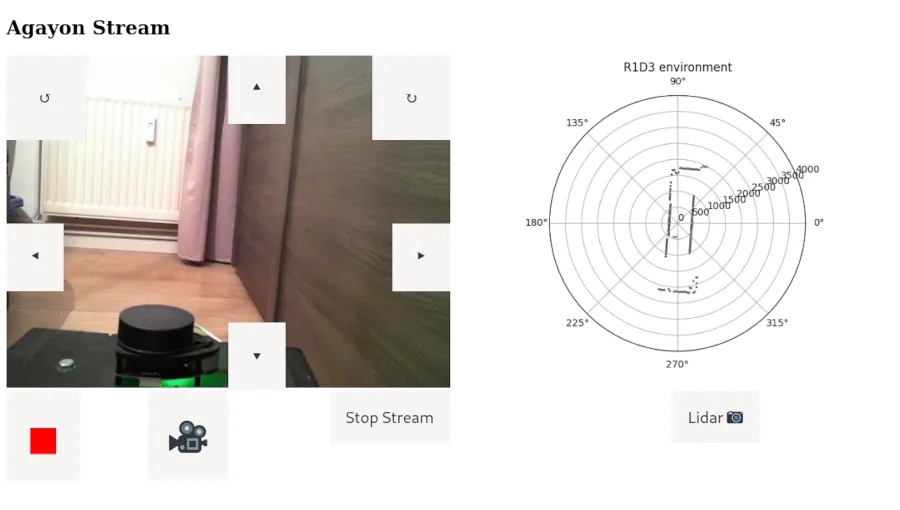
As the robot is going forward, the mapping is updated by clicking on the Lidar camera button. For unknown reason, the left/right mapping is inverted in the picture.
Start
Middle
End
Future
There are still a lot of room for improvements. Here are some ideas to occupy me in the future:
Automatically save a camera picture when the lidar mapping is triggered.
Detect the kernel messages about battery. When the voltage is too low, the information is logged by the kernel and can be found with systemd. The idea would be to shut down the robot when necessary to avoid SD card memory corruption.
Apply some nice OpenCV filter to obtain a transformed video stream line in the movie Terminator. :-)
Use one button to trigger the video recording. Use a blinking LED to let known that it is "On Air".
...
Recording movies with the camera
Recording a movie with OpenCV can be done in less than 25 python lines. It works well with my old Logitech C170 but for some reasons it did not work out of the box with my Microsoft LifeCam Studio.
Dear visitor, if you have such a camera, here the magic trick to produce your new feature movie ! First, make sure to have this model with the lsudb command:
The camera produce naturally a MJPG stream. I would sum it up a stream of JPEG pictures. By default, the VideoWriter class will produce empty video files. Unfortunately, by default there are no debug message to help you.
Don't forget to use the following environment variables during your hacking sessions:
OPENCV_VIDEOIO_DEBUG=1OPENCV_LOG_LEVEL=verbose
To make it work, you need to tune the camera settings before obtaining the desired result. The complete program is displayed here. Follow the comments to see where the magic happens.
importcv2importoscap=cv2.VideoCapture(0)ifnotcap.isOpened():raiseIOError("Cannot open webcam")# Magic number corresponding to a MJPG Streamcodec=0x47504A4D# You actually says that your camera produces such a streamcap.set(cv2.CAP_PROP_FOURCC,codec)# We fix the resolution, the framerate and use exactly the same in the VideoWriter arguments cap.set(cv2.CAP_PROP_FRAME_WIDTH,640)cap.set(cv2.CAP_PROP_FRAME_HEIGHT,480)# The framerate is not limitating herecap.set(cv2.CAP_PROP_FPS,20.0)# next we define the filename, the writer options and start the infinite loop.videoname=os.path.join('/tmp/',f"output.avi")fourcc=cv2.VideoWriter_fourcc(*'MJPG')video_writer=cv2.VideoWriter(videoname,fourcc,20.0,(640,480))whileTrue:ret,frame=cap.read()video_writer.write(frame)# When the Q key is pressed, the loop is stoppedifcv2.waitKey(1)&0xFF==27:breakcap.release()video_writer.release()cv2.destroyAllWindows()
Webserver configuration
You can find here the webserver and uWSGI configurations used to make it work.